Easy 3d Hair Modeling for Poser with splines and loft nurbs in cinema 4d
1. Set up
- Poser figures are very tiny in dimension when imported into Cinema, and very difficult to work with, so we have to set up Cinema’s Import/Export settings to accommodate this.
- Go to File>Import/Export Settings>Wavefront and enter 500 as the import/export factor, click ok.
- This will ensure that your figures will import into Cinema and back into Poser correctly sized.
- Import your figures head.
- press “control” and “a” on your keyboard to group them if they are the head and neck.
- Press “O” on your keyboard to zoom out to your figure.
- Create a “Background” object – this will make your test renders stand out better!
- Save scene as a template.
2. Create the Material
- On the Material Manager create a new material
- Double click on the material to open it
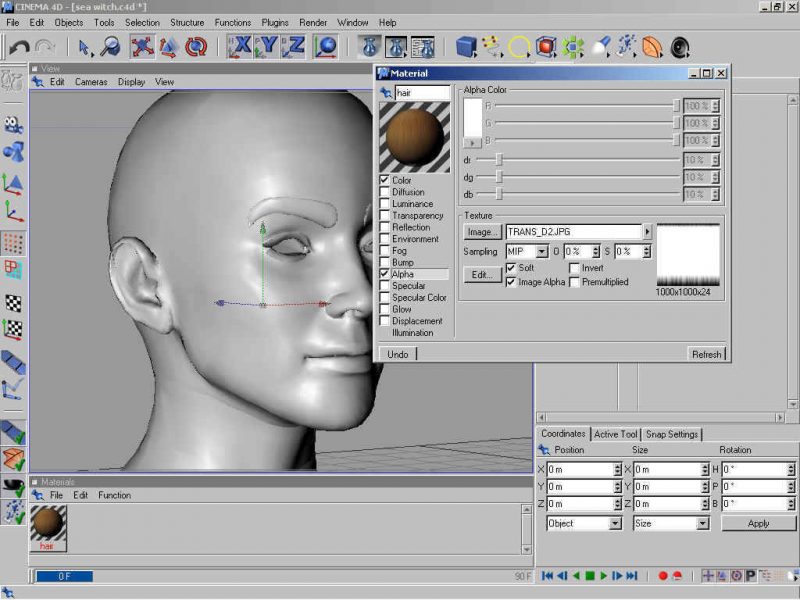
- Tick the colour box, then the Image button and browse to your texture
- Tick the Alpha box then click image and browse for your transparency map.

3. Create the loft and splines
- On the menu bar select Objects>NURBS>Loft Nurbs
- Drag your material onto the Loft Nurbs object in the Object Manager
- Accept the default mapping which should be UVmapping
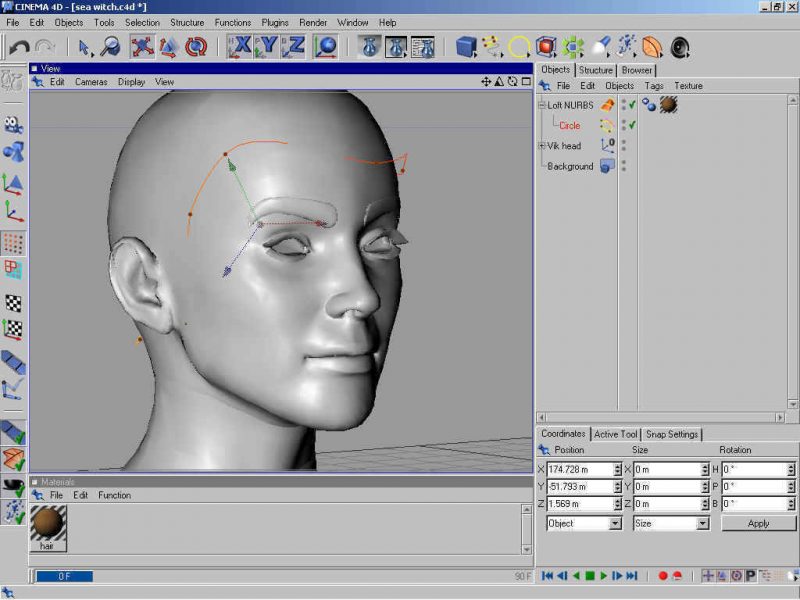
- I usually create a freehand spline next (the sqiggly yellow one on the top panel), following the contour of the head from the top view
- In the object manager drag the spline onto the Loft Nurbs object, making it a child of the Loft Nurbs.
- Hold down the control key and drag the spline under itself to create a new copy (in the Object panel) (you could copy and paste but this is quicker 😉 )
- In the main window make sure that the Object Tool is selected (the right hand side panel, blue square, cone and sphere) and move the second spline upwards and then use the scale key to resize as is needed.

Sign up for the WP Engine affiliate program and receive a minimum of $200 per referral!
4. Building up the model.
- Add more splines as necessary to build the loft, the beauty of C4D is the way you can see where your trans maps are applied and work the mesh around them.
- Go into Points mode and refine the points of your splines, you can use any shape, but if it is one of the preset ones you have to make it editable (by pressing “c”) first before you can move the points.
- If you find that your spline doesn’t have enough points, select the 2 points either side of where you would like a new one and press “k” on the keyboard to activate the knife tool, then make a slice between your points and a new one should be created.

5. Finishing up and tips
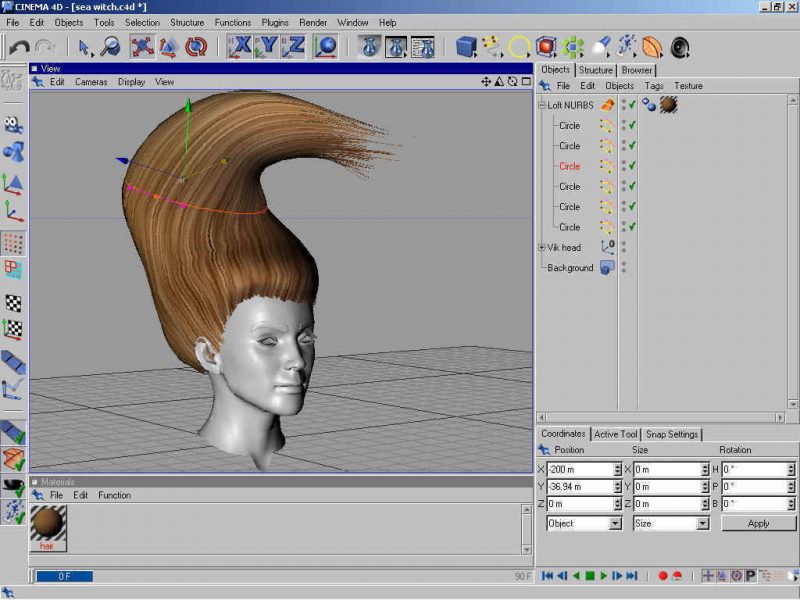
- Make lots of incremental saves! A style like this can easily be modified to be wild like this, a ponytail or an updo, so those partially completed projects will come in handy!
- This has created a hair model with just a single layer, you can repeat this process to add as many layers a you wish, giving the outermost layers a different transparency map that has thinner strands on it.
- Delete everything apart from the hair.
- Select the hair and press “c” on your keyboard to make it into an editable mesh, enter Polygon mode, go Selection>Select All to select all polygons then Structure>Reverse Normals. (For some reason Cinema 4d meshes always import into Poser with their normals inverted).
- File>Export>Wavefront to save your hair prop in Poser’s geometry folder.
- I would then parent the hair prop to the figures head, save either the hair or the prop library, export the hair, with the “Include existing groups in polygon groups” and then edit the HR2/PP2 file in CR2 Editor to make it point to the external geometry.
Hope this helps:)
